C#創建Windows服務的實現方法
Microsoft Windows 服務能夠創建在它們自己的 Windows 會話中可長時間運行的可執行應用程序。這些服務可以在計算機啟動時自動啟動,可以暫停和重新啟動而且不顯示任何用戶界面。這使服務非常適合在服務器上使用,或任何時候,為了不影響在同一臺計算機上工作的其他用戶,需要長時間運行功能時使用。還可以在不同于登錄用戶的特定用戶帳戶或默認計算機帳戶的安全上下文中運行服務。
創新互聯建站長期為上千家客戶提供的網站建設服務,團隊從業經驗10年,關注不同地域、不同群體,并針對不同對象提供差異化的產品和服務;打造開放共贏平臺,與合作伙伴共同營造健康的互聯網生態環境。為東坡企業提供專業的做網站、網站建設,東坡網站改版等技術服務。擁有十載豐富建站經驗和眾多成功案例,為您定制開發。
一、創建Windows 服務
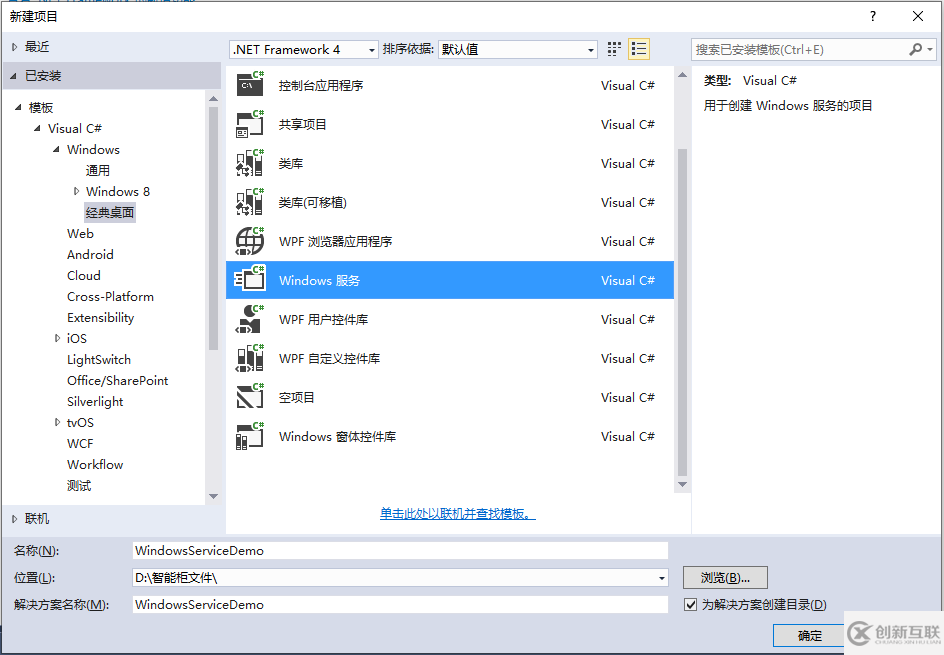
1.新建一個Windows 服務,并將項目名稱改為“WindowsServiceDemo”,如下圖所示:
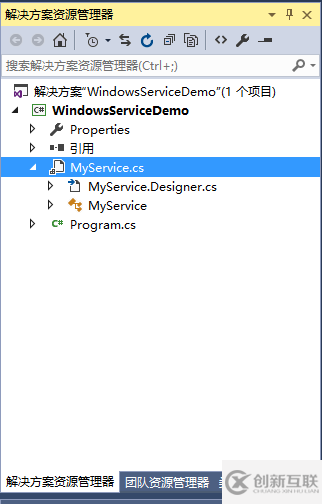
2.在解決方案資源管理器內將Service1.cs改為MyService.cs后并點擊“查看代碼”圖標按鈕進入代碼編輯器界面,如下圖所示:
3.在代碼編輯器內如入以下代碼,如下所示:
using System;
using System.ServiceProcess;
using System.IO;

namespace WindowsServiceDemo
{
  public partial class MyService : ServiceBase
  {
    public MyService()
    {
      InitializeComponent();
    }

    string filePath = @"D:\MyServiceLog.txt";

    protected override void OnStart(string[] args)
    {
      using (FileStream stream = new FileStream(filePath, FileMode.Append))
      using (StreamWriter writer = new StreamWriter(stream))
      {
        writer.WriteLine($"{DateTime.Now},服務啟動!");
      }
    }

    protected override void OnStop()
    {
      using (FileStream stream = new FileStream(filePath, FileMode.Append))
      using (StreamWriter writer = new StreamWriter(stream))
      {
        writer.WriteLine($"{DateTime.Now},服務停止!");
      }
    }
  }
}
4.雙擊項目“WindowsServiceDemo”進入“MyService”設計界面,在空白位置右擊鼠標彈出上下文菜單,選中“添加安裝程序”,如下圖所示:

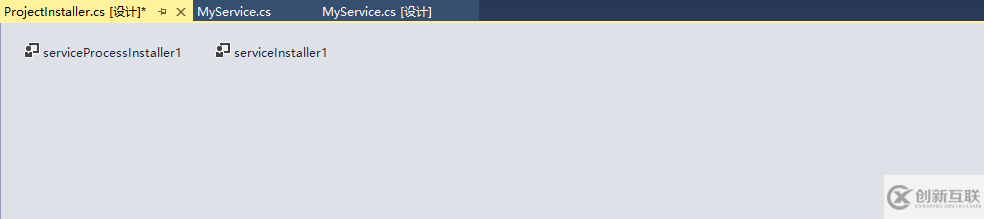
5.此時軟件會生成兩個組件,分別為“serviceInstaller1”及“serviceProcessInstaller1”,如下圖所示:
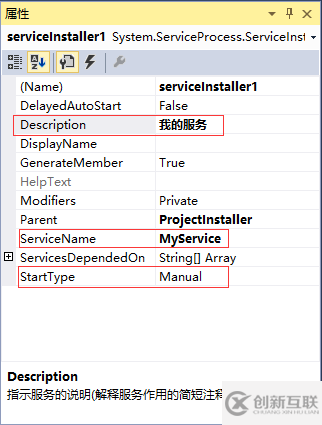
6.點擊“serviceInstaller1”,在“屬性”窗體將ServiceName改為MyService,Description改為我的服務,StartType保持為Manual,如下圖所示:
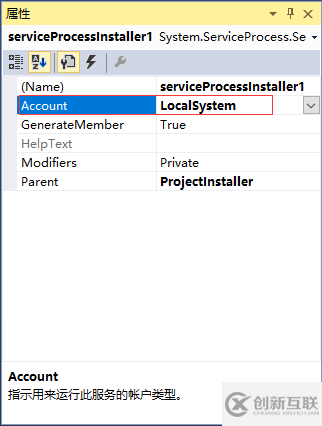
7.點擊“serviceProcessInstaller1”,在“屬性”窗體將Account改為LocalSystem(服務屬性系統級別),如下圖所示:
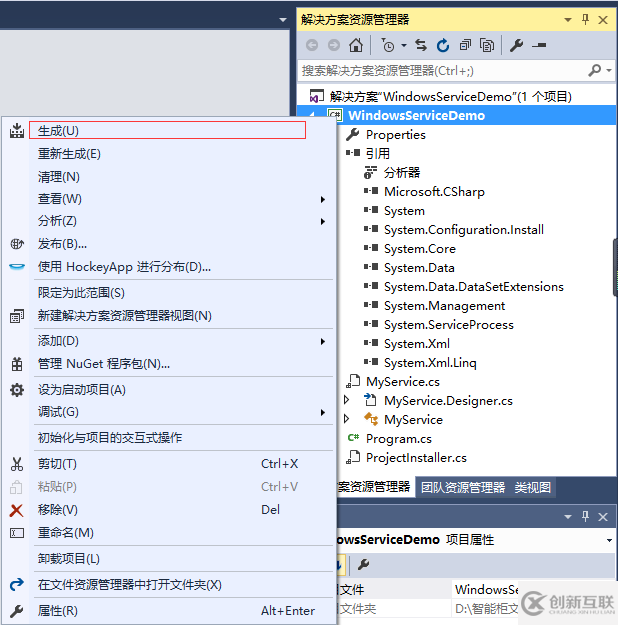
8.鼠標右鍵點擊項目“WindowsServiceDemo”,在彈出的上下文菜單中選擇“生成”按鈕,如下圖所示:
9.至此,Windows服務已經創建完畢。
二、創建安裝、啟動、停止、卸載服務的Windows窗體
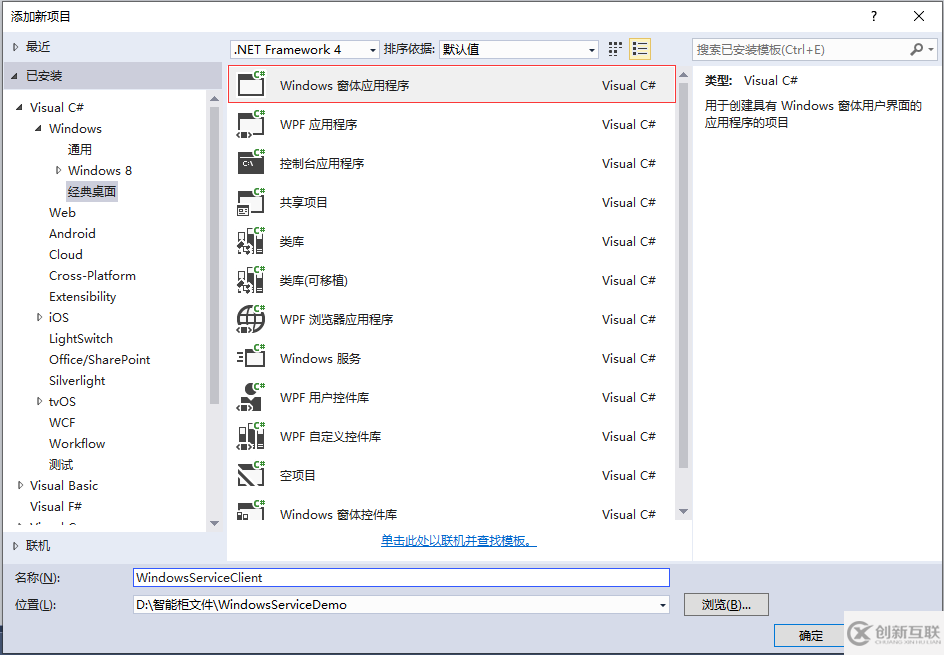
1.在同一個解決方案里新建一個Windows Form項目,并命名為WindowsServiceClient,如下圖所示:
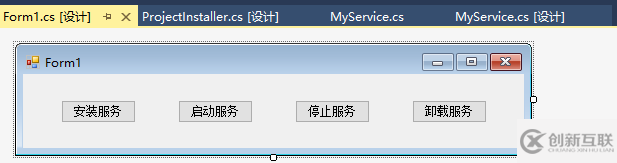
2.將該項目設置為啟動項目,并在窗體內添加四個按鈕,分別為安裝服務、啟動服務、停止服務及卸載服務,如下圖所示:
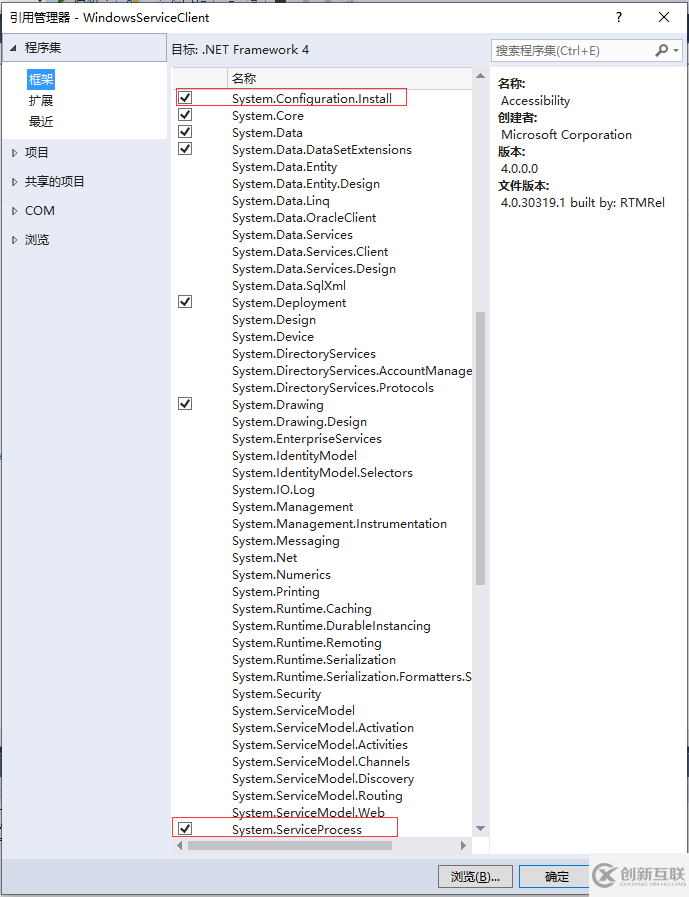
3.按下F7進入代碼編輯界面,添加引用“System.ServiceProcess”及“System.Configuration.Install”,并輸入如下代碼:
using System;
using System.Collections;
using System.Windows.Forms;
using System.ServiceProcess;
using System.Configuration.Install;
namespace WindowsServiceClient
{
public partial class Form1 : Form
{
public Form1()
{
InitializeComponent();
}
string serviceFilePath = $"{Application.StartupPath}\\WindowsServiceDemo.exe";
string serviceName = "MyService";
//事件:安裝服務
private void button1_Click(object sender, EventArgs e)
{
if (this.IsServiceExisted(serviceName)) this.UninstallService(serviceName);
this.InstallService(serviceFilePath);
}
//事件:啟動服務
private void button2_Click(object sender, EventArgs e)
{
if (this.IsServiceExisted(serviceName)) this.ServiceStart(serviceName);
}
//事件:停止服務
private void button3_Click(object sender, EventArgs e)
{
if (this.IsServiceExisted(serviceName)) this.ServiceStop(serviceName);
}
//事件:卸載服務
private void button4_Click(object sender, EventArgs e)
{
if (this.IsServiceExisted(serviceName))
{
this.ServiceStop(serviceName);
this.UninstallService(serviceFilePath);
}
}
//判斷服務是否存在
private bool IsServiceExisted(string serviceName)
{
ServiceController[] services = ServiceController.GetServices();
foreach (ServiceController sc in services)
{
if (sc.ServiceName.ToLower() == serviceName.ToLower())
{
return true;
}
}
return false;
}
//安裝服務
private void InstallService(string serviceFilePath)
{
using (AssemblyInstaller installer = new AssemblyInstaller())
{
installer.UseNewContext = true;
installer.Path = serviceFilePath;
IDictionary savedState = new Hashtable();
installer.Install(savedState);
installer.Commit(savedState);
}
}
//卸載服務
private void UninstallService(string serviceFilePath)
{
using (AssemblyInstaller installer = new AssemblyInstaller())
{
installer.UseNewContext = true;
installer.Path = serviceFilePath;
installer.Uninstall(null);
}
}
//啟動服務
private void ServiceStart(string serviceName)
{
using (ServiceController control = new ServiceController(serviceName))
{
if (control.Status == ServiceControllerStatus.Stopped)
{
control.Start();
}
}
}
//停止服務
private void ServiceStop(string serviceName)
{
using (ServiceController control = new ServiceController(serviceName))
{
if (control.Status == ServiceControllerStatus.Running)
{
control.Stop();
}
}
}
}
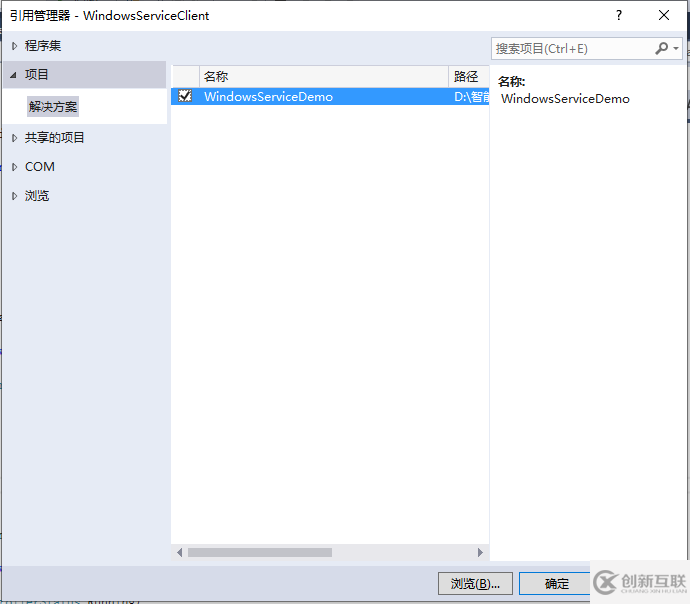
}4.為了后續調試服務及安裝卸載服務的需要,將已生成的WindowsServiceDemo.exe引用到本Windows窗體,如下圖所示:
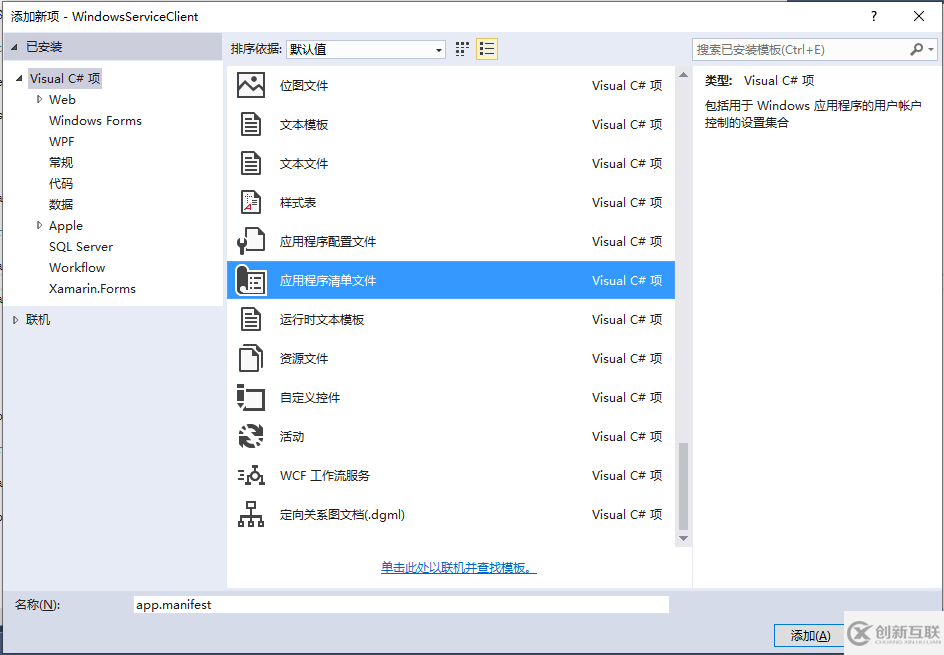
5.由于需要安裝服務,故需要使用UAC中Administrator的權限,鼠標右擊項目“WindowsServiceClient”,在彈出的上下文菜單中選擇“添加”->“新建項”,在彈出的選擇窗體中選擇“應用程序清單文件”并單擊確定,如下圖所示:
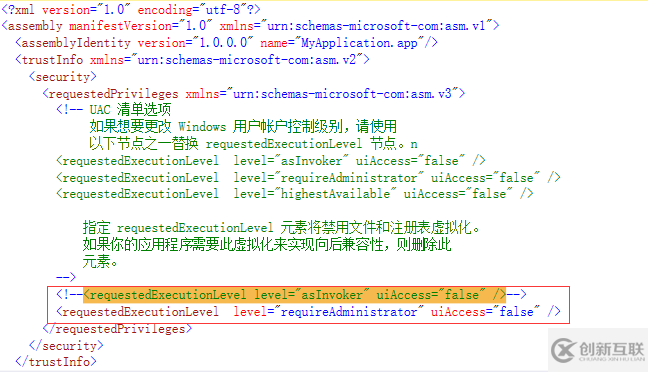
6.打開該文件,并將<requestedExecutionLevel level="asInvoker" uiAccess="false" />改為<requestedExecutionLevel level="requireAdministrator" uiAccess="false" />,如下圖所示:
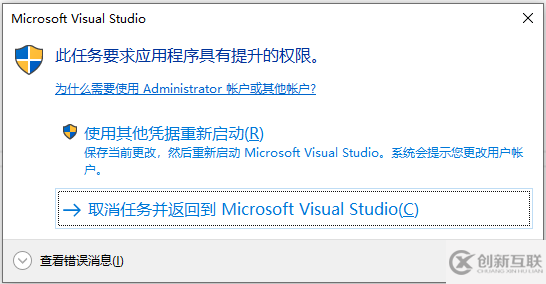
7.IDE啟動后,將會彈出如下所示的窗體(有的系統因UAC配置有可能不顯示),需要用管理員權限打開:
8.重新打開后,在IDE運行WindowsServiceClient項目;
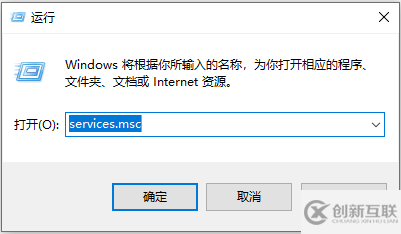
9.使用WIN+R的方式打開運行窗體,并在窗體內輸入services.msc后打開服務,如下圖所示:
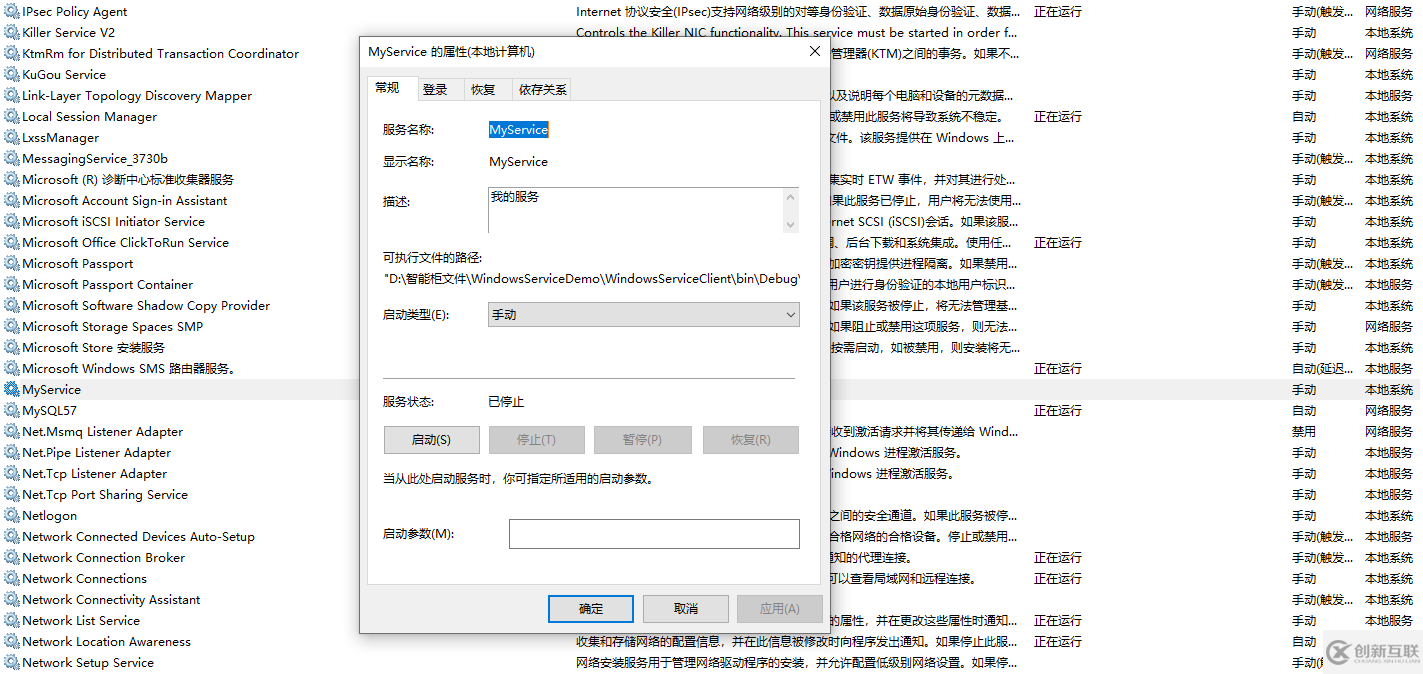
10.運行程序"Form1"點擊窗體內的“安裝服務”按鈕,將會在服務中出現MyService,如下圖所示:
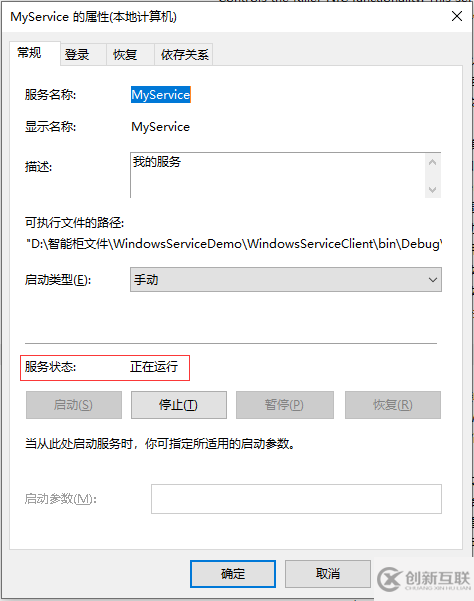
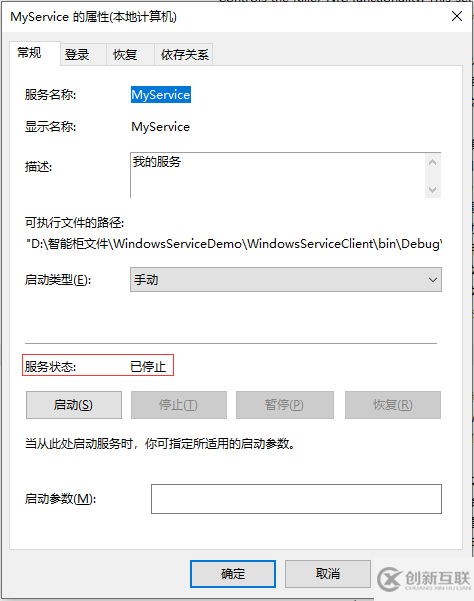
11.點擊“運行服務”按鈕,將啟動并運行服務,如下所示:
12.點擊“停止服務”按鈕,將會停止運行服務,如下圖所示:
13.點擊“卸載服務”按鈕,將會從服務中刪除MyService服務。
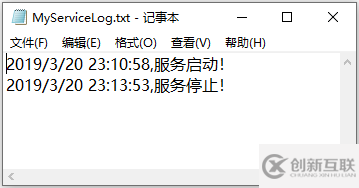
14.以上啟動及停止服務將會寫入D:\MyServiceLog.txt,內容如下所示:
以上就是本文的全部內容,希望對大家的學習有所幫助,也希望大家多多支持創新互聯。
文章名稱:C#創建Windows服務的實現方法
網頁地址:http://www.yijiale78.com/article44/ihdche.html
成都網站建設公司_創新互聯,為您提供ChatGPT、面包屑導航、、全網營銷推廣、營銷型網站建設、虛擬主機
聲明:本網站發布的內容(圖片、視頻和文字)以用戶投稿、用戶轉載內容為主,如果涉及侵權請盡快告知,我們將會在第一時間刪除。文章觀點不代表本網站立場,如需處理請聯系客服。電話:028-86922220;郵箱:631063699@qq.com。內容未經允許不得轉載,或轉載時需注明來源: 創新互聯

- 寶山網站建設公司-網頁設計公司-網頁制作公司 2020-11-16
- 虹口網頁設計公司關于CSS布局 2021-07-03
- 高端網頁設計公司經驗分享 2022-07-14
- 通過專業的網頁設計公司促進您的業務 2022-10-01
- 專業的網頁設計公司,成都網頁設計公司 2016-09-13
- 【成都網頁設計公司】如何讓網站建設別具一格? 2023-03-07
- 深圳龍華網頁設計公司談做網站建設的重要性 2022-05-28
- 為什么網頁設計公司定價高低差距大? 2022-08-17
- 成都網頁設計公司 2022-07-04
- 如何選擇成都網頁設計公司 2016-09-25
- 教您如何選擇好的成都網頁設計公司 2017-01-20
- 網頁設計公司給教育培訓行業明確功能 2016-10-22